Fall HVAC Switchover: The Complete Heating Season Startup Checklist
Published on September 11, 2026
Nobody calls a heating contractor in September. The phones start on the first night the temperature actually drops into the thirties, and the calls arrive in a tight block between dinner and bedtime. The complaint barely changes from house to house: the thermostat says heat, the rooms are cold, and the furnace either does nothing at all or fires for ninety seconds and quits.
Hardly any of those failures happened that night. They happened back in March or April, and then sat untouched through five months of summer while nobody asked the heating half of the system to do a thing. A deliberate fall switchover is how you find them on a mild Saturday afternoon instead of at 9 p.m. in the cold, with a dispatcher quoting you Thursday. Here is the whole changeover, in the order it should be done.
Two Questions Before You Touch Anything
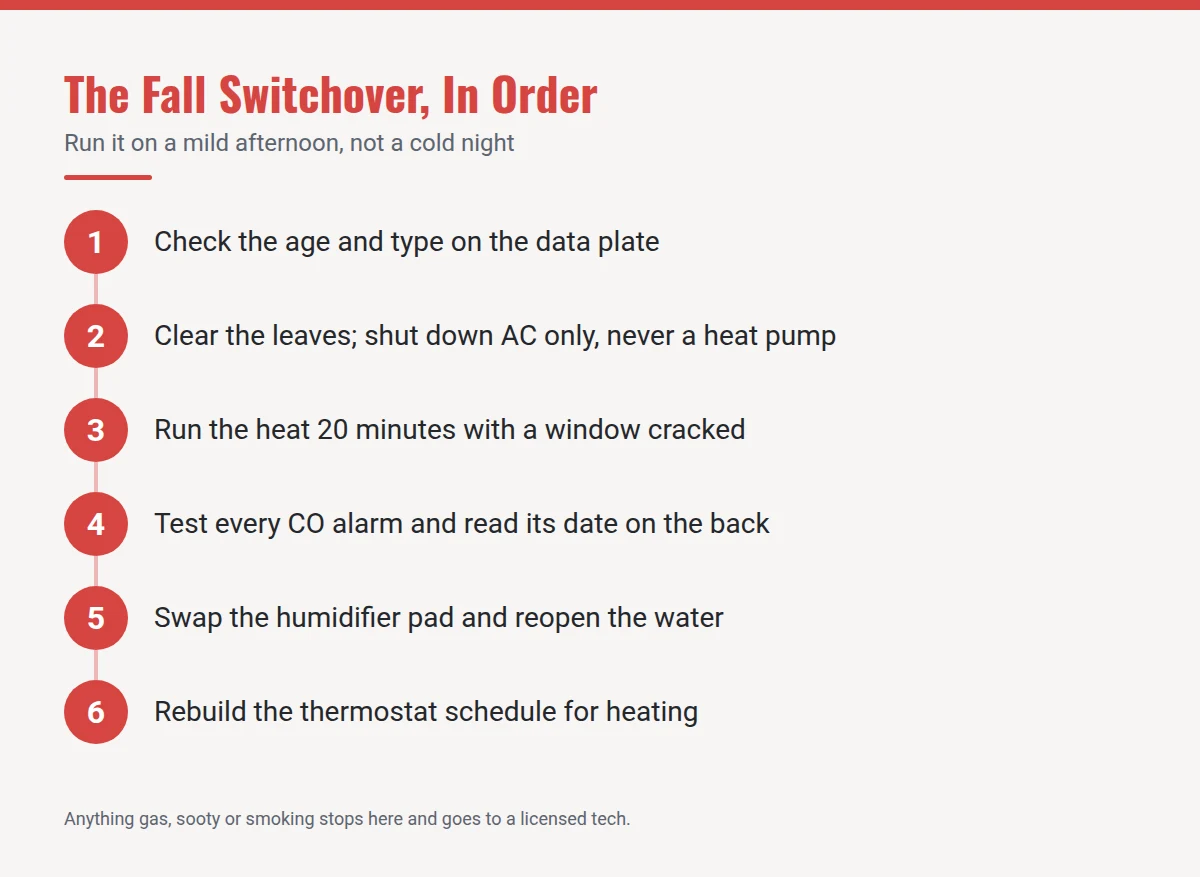
How old is the equipment, and what kind is it?
Age is usually printed on the data plate inside the furnace door or on the outdoor unit, and it is often encoded in the first four digits of the serial number. A gas furnace generally runs 15 to 20 years, an air-source heat pump 10 to 15, a cast iron boiler considerably longer. That number decides how you read everything below. A rough start on a nine-year-old furnace is a repair. The identical symptom on a 22-year-old one is the opening line of a replacement conversation, and it is far better to have that conversation in September than during a cold snap.
Type matters just as much. A furnace paired with a separate condenser gives you two distinct jobs this month: put one machine to bed, wake the other one up. A heat pump is a single machine that barely pauses, and that difference changes at least half the items on this list. The spring switchover checklist is the mirror image of this one, and running both is how a system gets looked at twice a year without paying for two service calls.
Put the Cooling Side to Bed
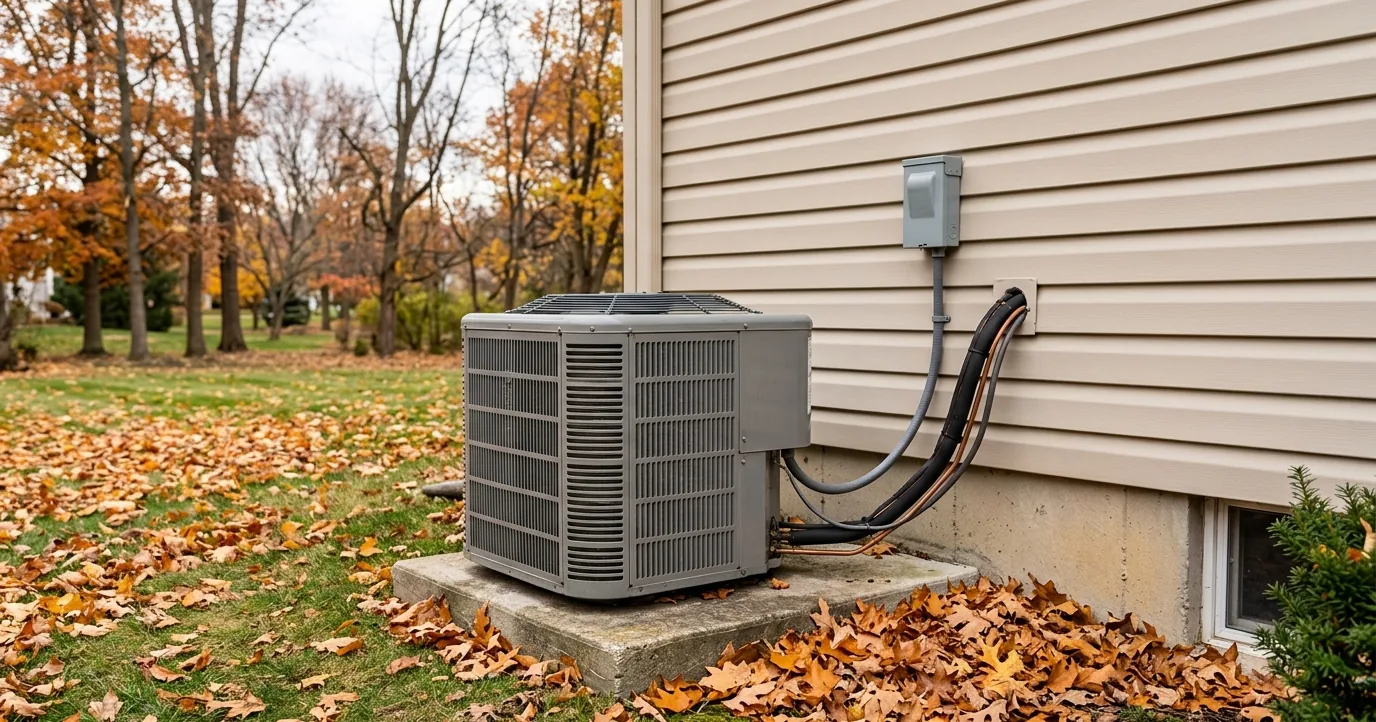
Clear the leaves first. Fall is the one season that genuinely buries an outdoor unit. Pull the debris out of the top grille, rake back two feet around the base, and cut back anything that dropped over the unit during the summer. A coil packed with wet leaves stays wet, and wet aluminum sitting against decaying organic matter corrodes fast.
Rinse the coil now instead of in spring. A gentle garden hose spray from the inside outward pushes a summer of cottonwood and dust back out the way it came. Never a pressure washer. The fins are thin aluminum and fold under almost no force.
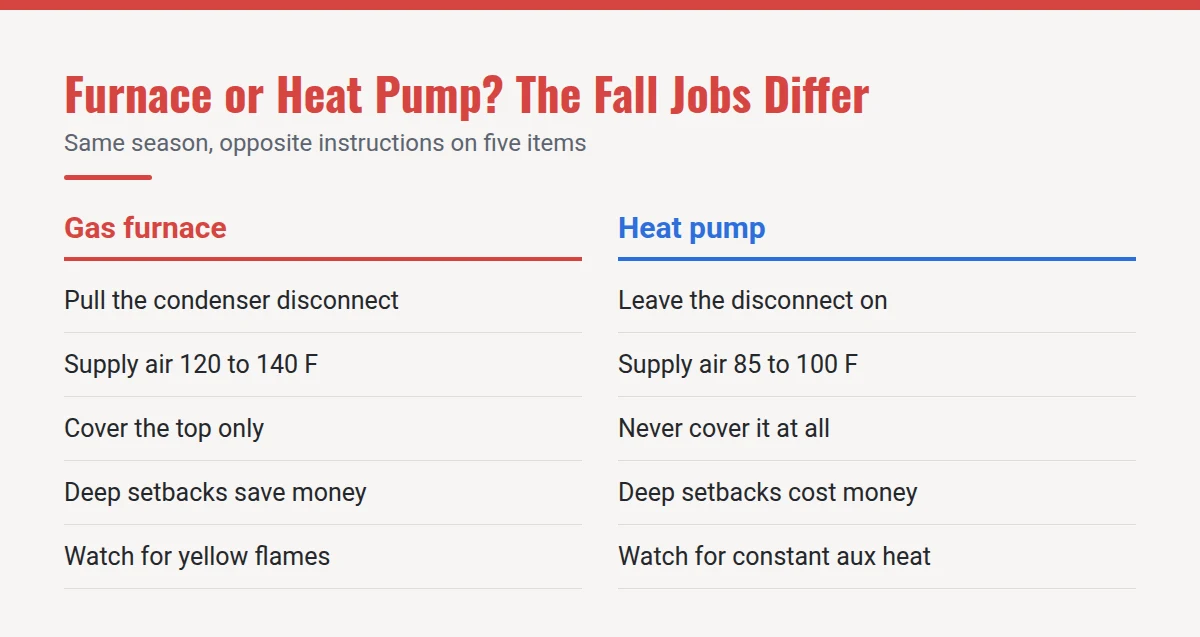
Cut the power at the disconnect only if it is an air conditioner. This is the single most important fork in this article. A cooling-only condenser can have its outdoor disconnect pulled for the winter. A heat pump absolutely cannot, because it is your heating system, and killing that disconnect also kills the crankcase heater that keeps liquid refrigerant out of the compressor oil.
Do not wrap the unit. A full cover traps moisture against the coil and builds a heated, sheltered winter apartment for mice and chipmunks, who repay the favor by chewing through low-voltage wiring. If you want protection from icicle drip and falling debris, cover the top only, or set a weighted piece of plywood across it, and leave every side open to the air.
Check the shared condensate drain. On a high-efficiency condensing furnace, the flue gas produces water, and that condensate usually shares a drain line with the air conditioner. That line has been running all summer and can be full of biofilm. A blocked drain on a 90 percent AFUE furnace trips a pressure or float switch and shuts the heat down, which is a no-heat call with no mechanical failure behind it at all.
The First Burn, and What That Smell Means
Pick a mild day, set the thermostat to HEAT about five degrees above room temperature, crack a couple of windows, and let the system run a solid 15 to 20 minutes. Stay in the house for it.
You will almost certainly smell something. Dust settles on a heat exchanger and burner assembly over five idle months and burns off on the first few cycles. That smell is normal, it should be noticeably fading within the hour, and it should be gone entirely after a couple of run cycles. Open windows while it clears.
What is not normal, and what should send you to the service switch: an acrid, sharp plastic or electrical smell, which points at motor windings or wiring rather than dust. A burning odor that comes back fresh at the start of every cycle days later. A boom or a whump at ignition, which usually means gas is pooling before it lights, a condition called delayed ignition that a technician needs to look at promptly. And a rotten egg or sulfur smell, which is the additive put into natural gas so you can detect it. In that last case you leave the house first and call the gas utility or 911 from outside. That is not a troubleshooting situation, and it never becomes one.
If you heat with a boiler, the startup is different. Check the pressure gauge while the system is cold, where 12 to 15 psi is typical for a two-story house, then bleed each radiator or baseboard loop until water rather than air comes out. Air trapped at the top of a loop is the standard reason one room stays cold while the rest of the house is fine. Do not drain the system to fix it.
Ignition Failures: Two Cheap Parts Behind a Lot of No-Heat Calls
If your furnace tries and fails, the pattern of the failure tells you most of what a technician needs to know.
The flame sensor is a thin metal rod sitting directly in the burner flame, and its only job is to confirm to the control board that a flame exists. A film of oxidation builds on it over a season and it stops sensing reliably. The signature is unmistakable: the furnace lights normally, burns for somewhere between three and ten seconds, shuts off, tries again, and after three attempts goes into lockout. Cleaning that rod with a fine abrasive pad takes a technician about four minutes, and it is the fix behind a startling share of October service tickets.
The hot surface igniter is the ceramic element that glows orange to light the burners. It is brittle, it fails at the end of its life without warning, and three to five heating seasons is a normal lifespan. The signature there is the inducer fan starting up and running, no orange glow anywhere, and then a lockout. Igniters are handled by the ceramic base only, because skin oil creates a hot spot that shortens their life.
When you call it in, describe the sequence in order: click, hum, glow, whoosh, blower. Where that sequence stops tells the dispatcher which part to put on the truck, and a truck that arrives with the right part is one visit instead of two.
The Flue, the Heat Exchanger, and the Line You Do Not Cross
Go outside and find where your furnace vents. On a condensing furnace that is a pair of PVC pipes coming through a sidewall, and on an older unit it is a metal flue into a chimney. Look for nests, spider webs, leaf pack, and anything blocking the screens. A bird nest in an intake or exhaust is a genuinely common fall discovery, and a blocked vent is a lockout on a good day and a carbon monoxide problem on a bad one. Note where snow drifts against that wall, too, because a sidewall termination buried in February is the same blockage.
On a metal vent, look for rust streaks, loose joints, and any section that has pulled apart at a seam.
The heat exchanger itself is not something a homeowner can properly inspect, and nobody should pretend otherwise. What you can see are its warning signs. Burner flames should be mostly blue and steady. Yellow, lazy, flickering flames, or flames that roll outward toward you when the burners light, mean stop. So does soot anywhere in the burner compartment, or rust and water staining inside the cabinet.
Here is the go-no-further line. Shut the system off at the service switch and call a licensed technician, without restarting it to see if it does it again, if any of these are true: a carbon monoxide alarm sounds, you smell gas, the flames are yellow or rolling, there is soot in the burner area, the flue is rusted through or disconnected, or people in the house have had headaches, nausea, or unexplained fatigue that improves when they go outside. That last one is the pattern of carbon monoxide exposure, and the CDC attributes more than 400 deaths and roughly 100,000 emergency room visits a year in the United States to unintentional CO poisoning outside of fires.
Carbon Monoxide Alarms: Test Them, Date Them, Place Them Right
Combustion season starts this month, so the alarms get checked this month.
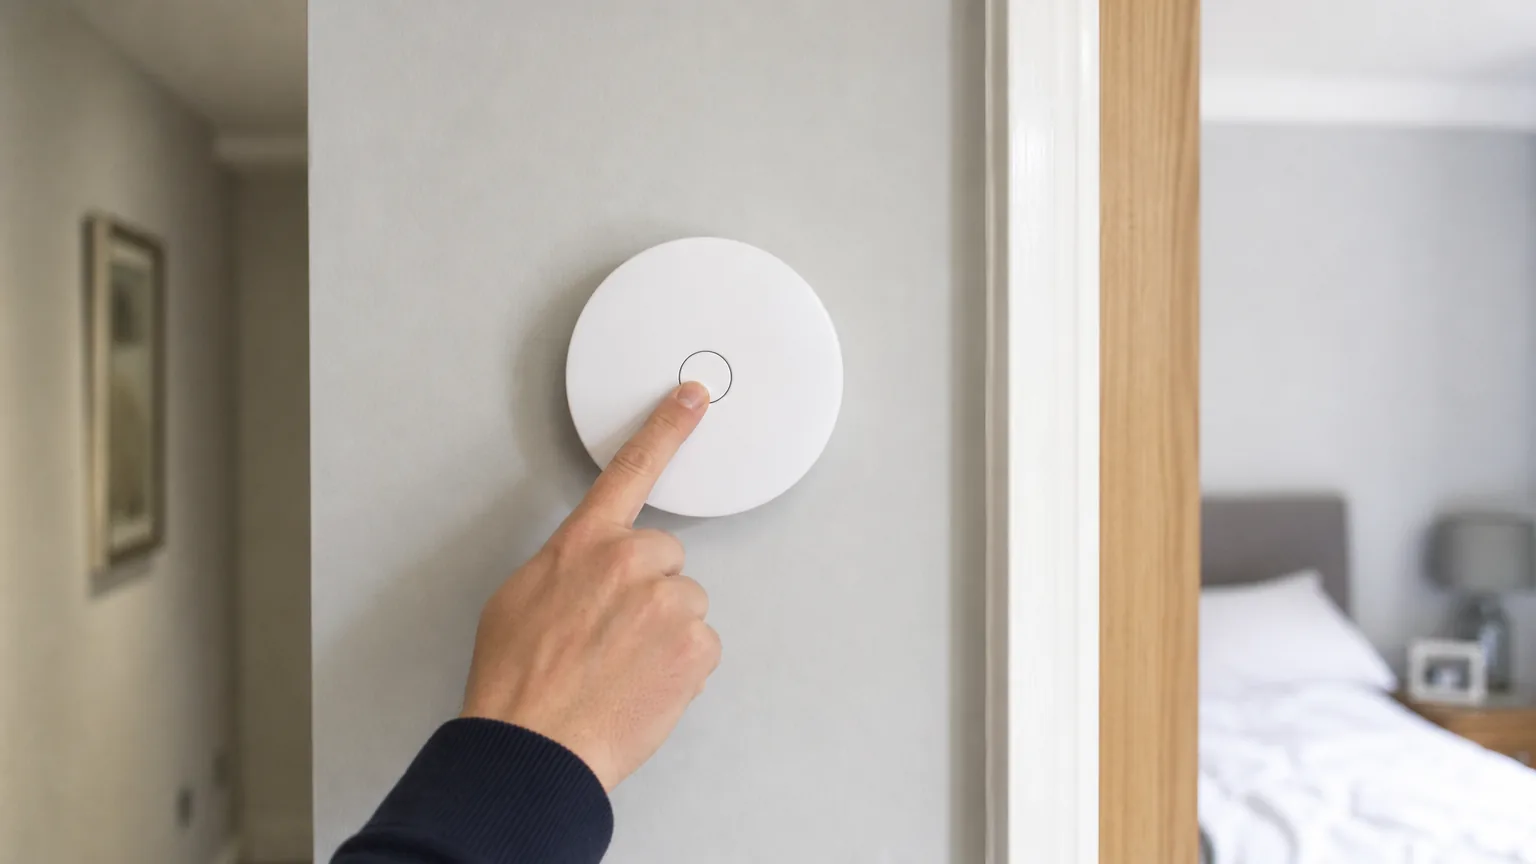
Press the test button on every alarm in the house. Understand what that tells you, though: the button verifies the horn and the electronics, not the sensor. That is why the second step matters more. Take each alarm off the wall and read the manufacture date printed on the back. Carbon monoxide sensors are consumable and expire in seven to ten years depending on the model, and an expired alarm is a plastic decoration. Newer units chirp a distinct end-of-life pattern that people routinely mistake for a low battery and silence for another year.
On placement, install an alarm on every level of the house including the basement, plus one outside each separate sleeping area. Follow the manufacturer’s instructions, which generally means keeping the alarm at least 15 feet from cooking and fuel-burning appliances so ordinary startup puffs do not cause nuisance trips, and out of humid bathrooms and dead air corners. Height matters less than people expect. Carbon monoxide mixes evenly with air rather than rising, so a CO alarm does its job at outlet height, mid-wall, or on the ceiling. The exception is a combination smoke and CO unit, which follows the smoke alarm rule instead: on the ceiling, or high on a wall within a foot of it. Any house with a gas or oil furnace, a boiler, a gas water heater, a fireplace, or an attached garage needs them, and that is most houses.
If an alarm goes off for real, get everyone outside into fresh air first, then call 911 from outside. Do not open windows and go back in to investigate.
Wake the Humidifier Back Up
If a whole-house humidifier is strapped to your ductwork, it has been deliberately shut down since spring, and it will not restore itself.
Move the bypass damper from the summer position back to winter, and open the small saddle or supply valve feeding it. Then replace the evaporator pad. It is an annual part that runs $15 to $30, and a pad crusted with last winter’s minerals passes very little moisture while giving biology a place to live. Confirm the drain runs freely and that the solenoid valve actually opens when the humidistat calls.
For the setting, 30 to 50 percent relative humidity is the normal indoor target, and in practice most homes land at 35 to 40 percent and go lower as it gets colder outside. The feedback loop is your windows. Condensation on the glass means you are running too wet, and that water ends up in wall cavities and window frames.
Reprogram the Thermostat for Heating, Not Cooling
A schedule built for July is actively wrong in November, because the logic inverts. In cooling you raise the setpoint when the house is empty. In heating you lower it. Leave the summer program in place and it will spend the fall working against you.
Put fresh batteries in while you are in there, and check that the mode reads HEAT rather than EM HEAT or AUX. The Department of Energy puts the savings from a 7 to 10 degree setback over eight hours a day at up to 10 percent a year on heating and cooling.
Heat pump owners get the opposite advice on setbacks, and this trips up people who just switched fuels. A deep overnight setback means the system has to recover in the morning, and recovery pulls in the electric resistance strips, which cost two to three times what the compressor costs to make the same heat. Keep heat pump setbacks to about two degrees, or use a thermostat with adaptive recovery designed specifically for heat pumps. Our smart thermostat guide covers which models handle that properly.
Four Fall Jobs a Furnace Checklist Misses on a Heat Pump
Prove the reversing valve actually reverses. Run the system in heat for 10 to 15 minutes on a cool morning and put your hand at a supply register. Heat pump supply air is warm rather than hot, typically 85 to 100 degrees against a furnace’s 120 to 140, and that lukewarm feel is the most common heat pump complaint in existence. It is normal. Air that is genuinely cold while the outdoor unit runs is not, and a reversing valve stuck in the cooling position is the usual reason.
Watch one defrost cycle before December. In frosting weather a heat pump reverses itself every 30 to 90 minutes to melt ice off the outdoor coil. The outdoor fan stops, the unit clunks, and steam rolls off the coil for a few minutes. Fire departments get called for this every winter. Knowing what it looks like in October saves you the embarrassment.
Find out when your auxiliary strips are running. Electric backup heat should engage only when the compressor cannot keep up or during a defrost cycle, not on every call. An aux indicator lit in 45 degree weather points to a setpoint problem, an airflow restriction, or a miswired thermostat, and it is the mechanism behind heat pump bills that suddenly triple. Those strips are also the largest single electrical load in most houses, which is why panel capacity comes up whenever backup heat is sized. On a dual-fuel system, this is also the moment to confirm the outdoor lockout temperature is set where it belongs rather than wherever the installer left it.
Set the unit up to survive snow. A heat pump needs clearance above the pad, ideally 18 to 24 inches in snow country, and it needs its defrost meltwater to drain rather than pool and refreeze around the base. Keep the roof drip line off it, clear snow by hand rather than with a shovel edge against the fins, and never cover it. For the deeper cold weather picture, our cold-climate heat pump guide covers capacity at low temperatures.
Book the Tune-Up Before the Rush
A heating tune-up generally runs $75 to $200, and annual maintenance plans in the $150 to $350 range typically bundle both seasonal visits with priority dispatch and a parts discount. September and early October are the window. By the first cold snap you are behind emergency calls, sometimes at overtime rates.

A real heating visit is longer than a cooling one and includes a combustion analysis measuring CO in the flue gas and confirming proper draft, a manifold gas pressure check, a temperature rise measurement across the heat exchanger compared against the data plate, burner and flame sensor cleaning, amp draw on the inducer and blower, and testing of the limit, pressure, and rollout safety switches. On a heat pump, add refrigerant pressures, defrost board operation, reversing valve function, and amp draw on the backup strips. A twenty-minute stop that ends in a replacement quote is not a tune-up. Our piece on annual furnace inspections covers what a thorough one includes, and documentation from it is often what keeps a manufacturer’s warranty valid.
The Bottom Line
The fall switchover is not the spring one run backwards. It has its own specific failure modes: a condenser left wrapped and full of mice, a shared condensate drain that shuts down a brand new furnace, a filmed-over flame sensor, a bird nest in a sidewall vent, a CO alarm that expired in 2019, and a humidifier pad so scaled it does nothing. None of them announce themselves. They wait for the night the heat matters, which is also the night every technician in your county is already booked. Run the heating side once on a mild afternoon while it is still just a chore.
Further reading (sources)
- U.S. Department of Energy on what furnace and boiler maintenance actually covers
- Centers for Disease Control and Prevention for the symptoms and scale of carbon monoxide poisoning
- U.S. Consumer Product Safety Commission with where carbon monoxide alarms belong in a house
- ENERGY STAR covering why a pre-season professional check-up is worth booking
- U.S. Department of Energy and how heat pumps behave differently on a thermostat schedule